SeanHoppe.com > CLEO Tips > EXTOL Secure Setting Up New EXTOL Secure Partnership
Setting Up New EXTOL Secure Partnership
11th June 2014
Setting up a new EXTOL Secure Partnership should be an easy process. Below are the steps involved with setting up the new AS2 partnership.
Step 1 - Creating a Partner-
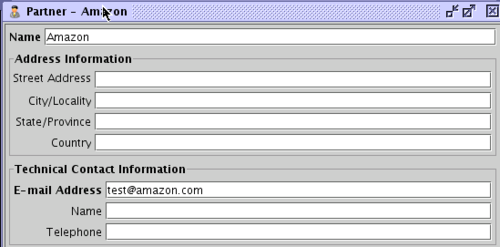
Click on the Partner icon. Next click on the Add icon on the top left. After that you fill in the required information, Name and E-mail Address are the only ones necessary. You can fill in more if needed.
Step 2 - Creating a Channel-
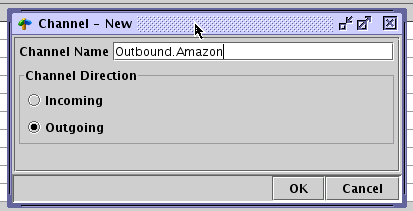
Click on the Channel icon. Next click on the Add icon on the top left. Put in the name of the channel and which direction it will be used for, Incoming or Outgoing. The incoming channels are for EBI or EEI processing.
Step 3 - Importing a Certificate-
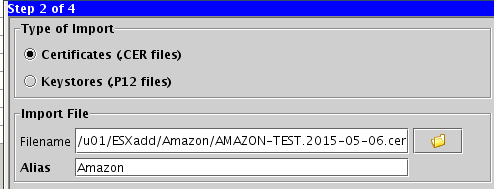
Click on the Private Keys Certificates icon. Next click on the Import icon and select the Type of Import as Certificates (CER files) button. After that is done point the path of where your certificate is located into the Filename box and then give it a name.
Step 4 - Creating a Partnership-
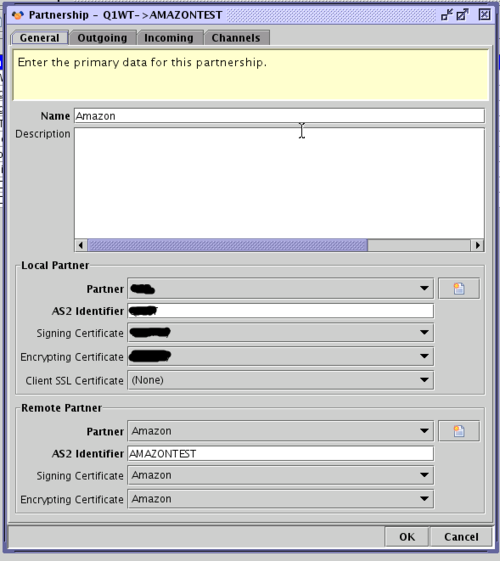
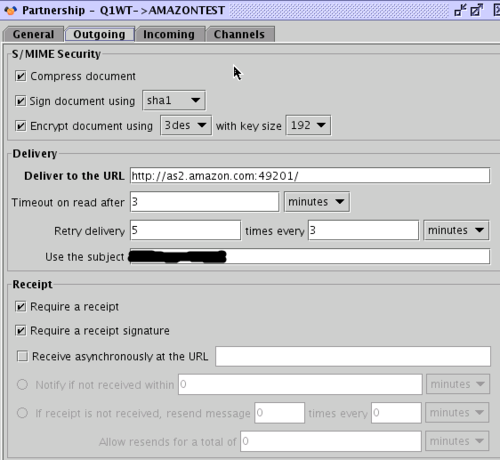
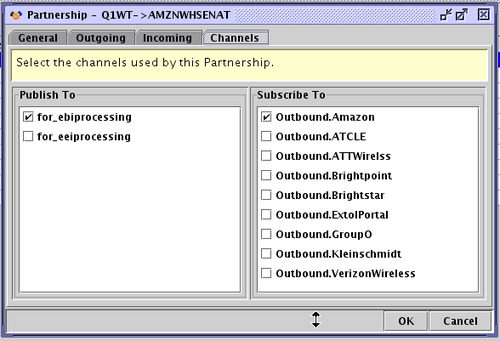
Click on the Partnerships icon. Next click on the Add icon on the top left. Hit next at the 1st screen. On the 2nd screen you want to fill in the necessary fields, which are the Name, Partner, and AS2 Identifiers then hit Next. On the 3rd screen the only required field is the Deliver to the URL section, but in our example we selected and filled in a few more areas. After that, hit Next and the 4th screen will appear. This screen is for Incoming Transactions and we do not use this so just hit the Next button again. The final screen is the Channels section and that is where we select the channels you made earlier.
Step 5 - Creating a Directory Listener
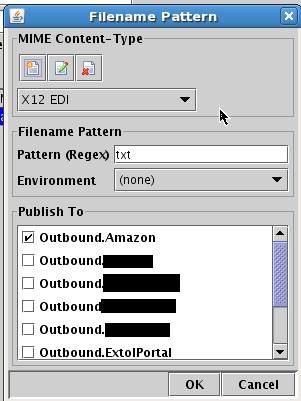
Click on the Filesystem Integration icon. Next, click on the Add icon on the top left next to Directory Listeners. Fill in all of the fields with the proper information. Once filled-out, click on the Add icon under Monitored Filename Patterns. For this we filled in and selected the following for our example.

Step 5 - Creating a File Writer
Click on the Filesystem Integration icon. Next, click on the Add icon near the center, which is next to File Writers. Fill in the fields and ensure s the file path is exists. Once the file path is etablished determine what filename we want to use. Then select the Incoming channel you created earlier.
For more information on using EXTOL Secure
By: Sean Hoppe on